Mother’s Day Candy Rose Molds

Mother’s Day Candy Rose Molds

Hello and Happy Mother’s Day! Here at the Make Shoppe we’ve whipped up some treats that you can make and give to Mom.

These pretty floral candy molds were extremely easy to make! All you need is some melting candy chips and a candy mold. There are a variety of colors to choose from but the choice of flavors are pretty standard (chocolate, vanilla or mint). I chose my candy colors based on what I felt complimented the other goodies I made. If you’re goal is to create a really unique color you could also start with a white chocolate or vanilla candy base and die the candy with food coloring however I generally use the pre-colored candies.

MDM#1


I usually shop at Michaels for all my candy making items. The different molds choices are really cute and I see new ones all the time.

I also whipped up some cupcakes with a cinnamon based cream cheese frosting. I am just so addicted to this I don’t think I’ll ever make this frosting WITHOUT THE CINNAMON! Oh my Gosh! You must try this on your next batch of cupcakes!


MDM#2


Cinnamon Cream Cheese Frosting

Ingredients:
1/2 C butter ( 1 stick),  room temp
8 oz cream cheese ( 1 package), room temp
2-3 C powdered sugar
1 tsp vanilla extract
cinnamon, to taste

Put it Together:
With an electric mixer, mix the butter and cream cheese together for about 3 minutes on medium speed until smooth. Scrape down the sides and bottom of bowl to ensure even mixing. Add the vanilla, cinnamon and mix. Then slowly add the powdered sugar and keep adding until you get to a desired sweetness and thickness. Spread on cooled cupcakes or use a fancy decorator. Sprinkle with edible decoration for extra pretty!

Enjoy!

-Tutu

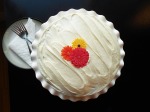
My Perfectly Crooked Early Autumn Cake

My Perfectly Crooked Early Autumn Cake

Don’t you just love working with gooey materials when it’s 100 degrees + outside? Yeah…me too…

Today, I just thought, well hmm, I haven’t baked or cooked in awhile so I’ll make a cake! And I almost blamed this partial disaster on Maple… but really…it was just a bad day to frost a cake…

As you can see below it wasn’t a total disaster. I slide the cake into place to take better photos but before-hand it was a real leaning tower of CAKE!  I must add if were serving this cake to company…I’d probably start over but that’s just me. If you’d like to know how to properly frost a cake…see the steps I took below…just choose to do it on a cooler day!!

*helpful note* Make sure your cakes are completely cooled. If not, you will pick up crumbs from the cake while you frost. You may also chill your cakes in the freezer before you start!

Step#1- Prepare cake according to box mix directions to make 2 round cakes. Choose any cake mix you’d like or spice cake for an autumn flavor!

Step#2 & #3- Take a bread knife and slice off a thin layer of the top of the cake. Do the same for both cake tops.

Step #4- Smear a small amount of the frosting on your cake plate. This is to hold it in place.

Step#5-Place one of the cakes upside down onto the cake plate. Again, you are going to place the freshly cut side down leaving the flat side of the cake, up.

Step#6 & #7- Smear a nice amount of the frosting on the top of the cake. This doesn’t have to be perfect, just enough to cover the top.

Step#8- This is a repeat of step #5. Place the second cake on top of the first cake. Again, freshly cut side down.

Step#9, #10, #11- Generously smear the rest of the frosting on the top, edges and sides of your cake. *Note* Work in small batches with plenty of frosting so you don’t have any thin spots.

Step#12- ENJOY!

From me to you…

Tutu